Please, Stand Up!
I’m going to let you in on a little secret: I’m one of those people who is absolutely hopeless at getting her Barbie dolls to stand on their own. In fact, I’ve never actually managed to do so, even with the doll having bare feet. Okay, with the exception of Cole, but he’s extremely cooperative.
Today, I thought I’d share a DIY/at-home trick that I recently started using to get Eve to stand up for photos, rather than using a traditional doll stand, having her lean against walls, or using a diorama chair to stabilize her.
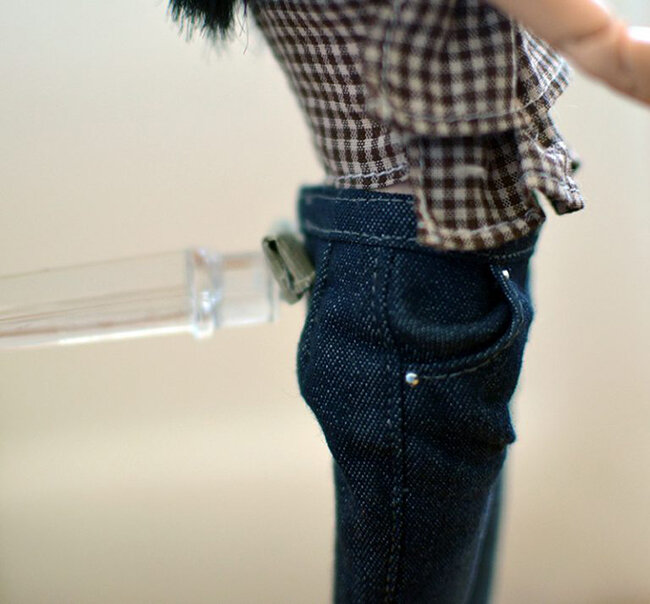
The new method has her posed, as if standing on her own, like so:
It’s a simple process; if I can do this, anyone can.
You just need some clear tape, a Barbie stand—or something similar—and either a nearby wall or sturdy diorama piece. In this instance, I’m using the windows on my reading window seat - but I have used chairs, tables, and even another doll once before.
Step one: Remove the base of the stand, you won’t be needing it for this. Hang onto the “spine” and “waist grip”; I don’t know the actual names of these pieces, so I’m just guessing here. If you know them, feel free to correct me in the comments.
Step two: Place the rounded waist grip on the wall, or slide it into your diorama, at roughly the same height as your doll’s lower back, then, if you don’'t have a window (like this), go ahead and tape it in place.
Please note that tape can leave a sticky residue behind, and if you’re not careful, when you remove it you can also remove paint! Be careful, no one wants a damaged diorama.
As you can see, the long plastic bit protrudes a decent distance from the wall - the longer it is, the less sturdy it will be, but this is hard plastic and it should work nicely at this distance.
Step three: Add a small amount of tape to end of the plastic bit, for stability purposes.
No, you absolutely do not need to use duct tape, it just happened to be all I had on hand, so I made it work. Ideally, If you have double sided tape, that’s what you should use. It will work better than rolled tape ever could.
Step Four: Pose your doll and very gently press her against the tape, leaning her very slightly against the plastic if necessary. Usually, I hold onto the rod for stability, press the doll against it, fiddle with her feet a bit and I’m done. Takes two minutes and I’m sorted.
Please note, this set up is far from perfect, and if you’re not careful your doll may tip, slip, or fall. If you’re really not careful, you might even break the plastic rod itself. And, if you’re the ultimate in clumsiness and you’re just having an unlucky day, you may end up tipping part of your diorama over and spilling everything off of your shelves. Those tiny, precious bits and bobs would then be flung through the air in dramatic fashion, spreading throughout your living room and slipping between the cracks in the hardwood floor and you’ll be terrified to vacuum for the next week…not that I’m speaking from experience, or anything ;)
One last little tip: it’s safer to remove your doll from this setup each time you want to re-position him or her, rather than trying to get the entire rod to bend to your will. Trust me on this.
Step Five: Take the pictures, and enjoy.
I hope you find this helpful. Let me know if it works for you, or if you have any tips/tricks to get your dolls standing. As always, thanks for stopping by.


